
My most viewed, most pinned, most popular post on this blog is one that I wrote about our rainwater catchment system, which Steven created and installed back in March 2012. That post still receives daily hits, so clearly the interest in rainwater collection is very alive. I have often been asked to see more details, particularly how the water is accessed, so I thought it was time I filled in some blanks. If you missed the original post you can read it here.
Our catchment system, currently:
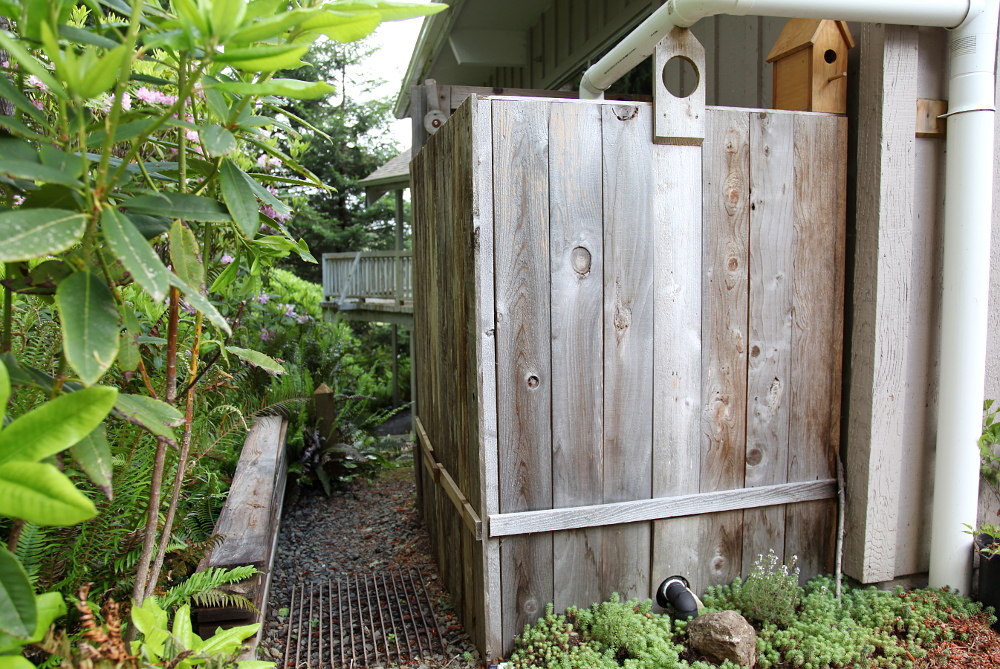
When the tank was first installed, we had trouble coming up with the right tank fittings to complete our vision, so for a while we accessed the water straight from the bottom of the tank, through a rubber fitting attached to a short section of hose. Steven has since buried a line out to a more convenient location at the front end of this little side-of-the-garage space. (Also, the container is now fully enclosed, for UV protection).

The line runs down the length of the side yard, from the tank at the back of the garage, along the garage wall (under the nursery pots). It takes a turn in the front, near the white pot, and runs parallel to the glass partition pictured above.
 The line then comes up to where you see the spigot, concealed between the cedar pickets (for reference, you can see the very end of the frame of the glass partition in the photo above). All above ground pipe is insulated with readily available pipe insulation, and held on with zip ties.
The cedar section in front of the concrete block wall will eventually have a small sink on it, and behind the (removable) panel of pickets, is storage for a hose and a place for a drain. This little side yard is a fun project in progress. Another post for another day maybe…

And a few closer details:
After the water is diverted at the Clean Rain Ultra, it enters the top of the tank. Coming up with the right fittings for this project was a little tricky, which I mentioned above, as the tank input and output openings are not sized to cooperate with most standard plumbing parts.


The cedar panel that surrounds the outcoming line is left unfastened for easy access to the tank’s shut-off valve. Because the catchment system is gravity feed, low pressure fittings can be used, such as the rubber one used here, with stainless pipe clamps. That rubber fitting compresses onto a PVC reducer. The reducer is threaded to fit common 3/4″ PVC pipe fittings. On the other side of the rubber fitting, it compresses directly to the tank outlet.

Steven also added a cleanout for the underground line, which a pressurized garden hose can be hooked to in case a clog ever needs to be blown out. The cleanout can also be used with a non pressurized hose, in case we ever need to fully drain the tank. Additionally, it’s helpful to be able to drain lines during periods of freezing temperatures.

We’ve been really happy with the Clean Rain Ultra, which I talked about in the original post. It’s been easy to maintain, simply needing an occasional clean-out of the screen, and it does it’s job keeping the tank free of debris and diverting the water.
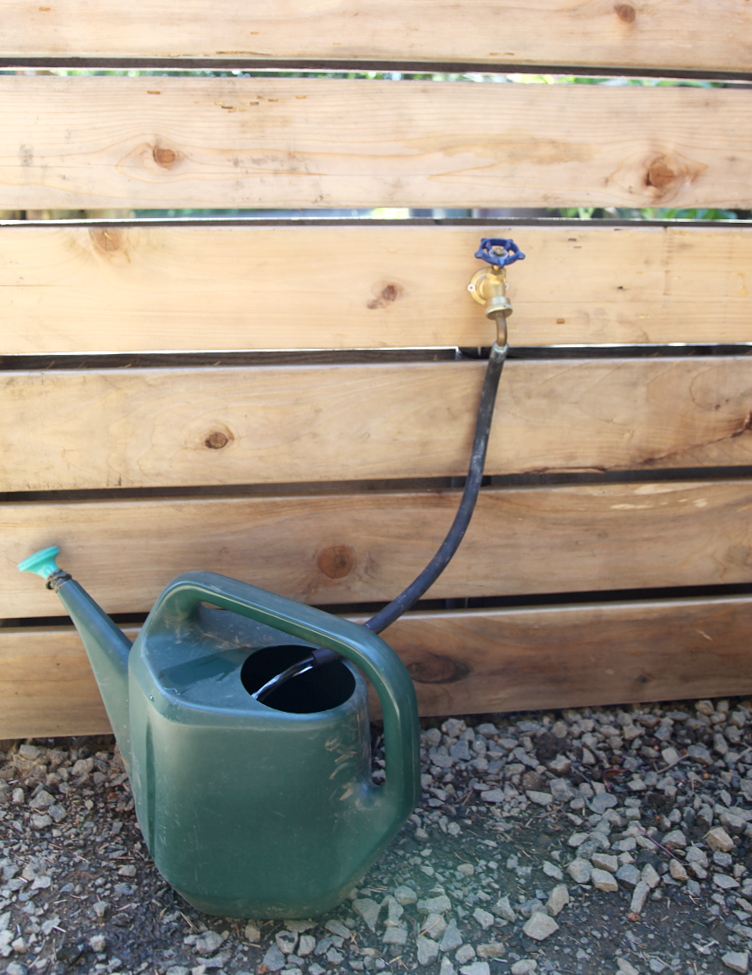
The rubber hose attached to the spigot is just a section of washing machine line. It makes it really easy to fill watering cans.

We use our catchment water constantly, and appreciate having such an abundant resource. Easy access and ease of use allows us to take full advantage of our investment. I feel inspired every time I get water from this tap!
If anyone has questions, feel free to ask and we’ll try to answer. I always appreciate seeing such enthusiasm for self sufficiency and creative solutions to real needs.
.
.
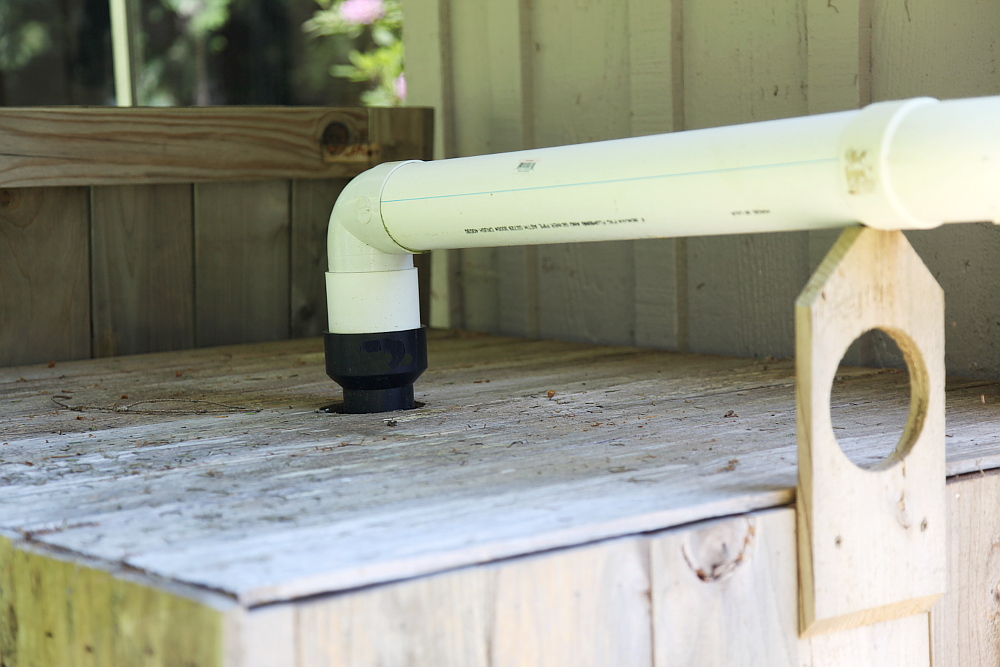
In response to a question in the comments below, the following drawing shows the connections to the top of the tank. You can click the photo to enlarge.
 Part of what made this set of parts tricky to come up with, is PVC and ABS are not traditionally made to interact.
No glue was used, and hasn’t been needed. We wanted to maintain the ability to take it apart if need be. Also, PVC doesn’t hold up well to UV, so insulation is recommended (as well as from freezing). Some people also paint their PVC to protect from UV.
In the photos above, which show the top of the tank, the second ABS fitting is visible. The first ABS fitting and section of pipe is below the level of the cedar top.
The opening at the top of our tank came covered with a large threaded cap. This cap has a smaller threaded cap within it to allow for inspection of the tank contents. The larger caps with inspection cap are available online, if yours didn’t come with one. We left the larger cap on the tank, and threaded the ABS fitting into the inspection hole.
catchment | I n f u s i o n
[…] 5/19/14 UPDATE: A new post has been added on May 19, 2014 which includes more details on the system. It can be found here. […]
Jenette
Thank you for the update. We have the same tank and I was wondering the types of fittings you used to connect to the top of the tank? Than you for the detail with the outlet!
abby
Hi, thanks for your question! I added some information to the end of the post with a drawing to demonstrate. Feel free to let us know if you have any other questions.
Cherri
Where would get a tank like that? I live in Oregon. Thank you
abby
Hi Cherri, We purchased ours from someone posting on Craig’s List. They were formerly used to hold organic sweetener of some sort. A web search for “300 gallon tote” will bring up some results to get you started, if you aren’t able to find one locally.
John
Great read and many thanks for the helpful advice. I’d like to pick you brain in wondering if you have any thoughts of using a pump of sorts (battery or a/c) that attaches to the top of the tank to then be used under light pressure due to length of hose to the garden and even to water our plants which are located 10′ above where my water tanks sit? Thanks in advance for any suggestions you can pass along. Have a blessed day!
John
Abby
Thanks John! I don’t know too much about pumps, but it’s certainly possible to pump water uphill, particularly with only a 10′ lift. I would imagine there are some nice solar or electric pumps out there that would be great for something like this. You could tap a hole in the tank and put a valve at the opening and then add your pump and hose. Be aware that some sediment can get into the tank, as can algae, and could have the potential of getting into your pump and hose. You would also want to plan accordingly for freezing and be able to drain the pump and hose. We buried most of our line with this in mind.